
- 분류 전체보기 (175)

| 일 | 월 | 화 | 수 | 목 | 금 | 토 |
|---|---|---|---|---|---|---|
| 1 | 2 | 3 | 4 | 5 | ||
| 6 | 7 | 8 | 9 | 10 | 11 | 12 |
| 13 | 14 | 15 | 16 | 17 | 18 | 19 |
| 20 | 21 | 22 | 23 | 24 | 25 | 26 |
| 27 | 28 | 29 | 30 |
- WSL
- node
- Kaikas
- AWS
- NextJS
- 티스토리챌린지
- React
- 블록체인
- Remix
- Ai
- miniconda
- CSS
- 회고
- 오블완
- 라라벨
- chatGPT
- nft
- nginx
- exceljs
- 배포
- Python
- huggingface
- netfunnel
- jquery
- polygon
- metamask
- PM2
- docker
- threejs
- Laravel
- Today
- Total
박주니 개발 정리
Gemma3 오픈소스 후기 본문
시작전 준비)
1. Hugging Face Token 준비
Hugging Face Token값 가져오기
1. Hugging Face을 로그인하고 Access Tokens를 클릭합니다. https://huggingface.co/ Hugging Face – The AI community building the future.The Home of Machine Learning Create, discover and collaborate on ML better. We provide paid Compute and Ent
junhee6773.tistory.com
Hugging Face Gemma3 권한 허용은 별도 하지 않습니다.
https://huggingface.co/google/gemma-3-27b-it
google/gemma-3-27b-it · Hugging Face
This repository is publicly accessible, but you have to accept the conditions to access its files and content. To access Gemma on Hugging Face, you’re required to review and agree to Google’s usage license. To do this, please ensure you’re logged in
huggingface.co
지금 이 모델도 다운로드하거나 로딩해서 추론이 진행할려면 GPU가 필요하기 때문에 Colab으로 진행했습니다.
https://colab.research.google.com/
Google Colab
colab.research.google.com
Hugging Face gemma 공식문서 보시면
Running the model on a single/multi GPU 에 있는 코드를 그대로 colab에 실행시킵니다.
from transformers import AutoProcessor, Gemma3ForConditionalGeneration
from PIL import Image
import requests
import torch

model_id = "google/gemma-3-27b-it"

model = Gemma3ForConditionalGeneration.from_pretrained(
    model_id, device_map="auto"
).eval()

processor = AutoProcessor.from_pretrained(model_id)

messages = [
    {
        "role": "system",
        "content": [{"type": "text", "text": "You are a helpful assistant."}]
    },
    {
        "role": "user",
        "content": [
            {"type": "image", "image": "https://huggingface.co/datasets/huggingface/documentation-images/resolve/main/bee.jpg"},
            {"type": "text", "text": "Describe this image in detail."}
        ]
    }
]

inputs = processor.apply_chat_template(
    messages, add_generation_prompt=True, tokenize=True,
    return_dict=True, return_tensors="pt"
).to(model.device, dtype=torch.bfloat16)

input_len = inputs["input_ids"].shape[-1]

with torch.inference_mode():
    generation = model.generate(**inputs, max_new_tokens=100, do_sample=False)
    generation = generation[0][input_len:]

decoded = processor.decode(generation, skip_special_tokens=True)
print(decoded)
이때 추가해야할 부분은
Hugging Face Token값 가져오기
1. Hugging Face을 로그인하고 Access Tokens를 클릭합니다. https://huggingface.co/ Hugging Face – The AI community building the future.The Home of Machine Learning Create, discover and collaborate on ML better. We provide paid Compute and Ent
junhee6773.tistory.com
Huggin Face Token 값을 "{{Hugging Face Token}}"에 넣으시면 됩니다.
os.environ["HUGGING_FACE_HUB_TOKEN"] = "{{Hugging Face Token}}"  # Replace with your actual token

model_id = "google/gemma-3-27b-it"

# Load the model and processor, passing the token explicitly
model = Gemma3ForConditionalGeneration.from_pretrained(
    model_id,
    device_map="auto",
    token=os.environ["HUGGING_FACE_HUB_TOKEN"]  # Pass the token here
).eval()
실행을 하면 결과값은
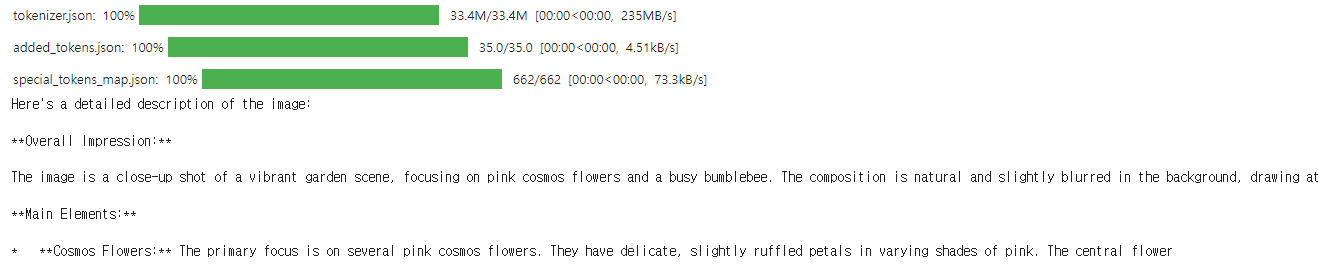
나오는 것을 확인하실 수 있습니다.
회고)
Gemma3는 딥시크나 라마와는 다르게 사용자의 GPU 사양에 따라 gemma3 모델을 선택할 수 있었습니다.
저는 Colab Pro으로 구독했기 때문에 A100 40GB를 사용할 수 있었는데
gemma-3-27b-it, gemma-3-12b-it을 진행했을때 GPU를 40GB를 넘게 사용해서 CPU로 넘어가다보니 추론까지 걸리는 시간도 서비스에 접목시키기 어려울정도로 오래걸렸습니다.
gemma-3-4b-it정도 되어야 20~30초이내 추론이 가능했지만 max-token 100기준으로 했기 때문에 간단한 LLM으로는 사용할수 있겠지만 코어 AI를 진행하기에는 어려운 부분이 있었습니다.
대형 모델을 사용하는 것 자체가 GPU 없이는 안되기 때문에 무료가 아니고 더더욱 문제가 되는 것은 한번 요청에 발생되는 GPU가 동시요청일 경우에는 배로 들 수 있기 때문에 확실하게 요청이 CPU기반이 아닌 이상 실제 서비스 올릴 때에는
AWS에서 진행할텐데 그만한 GPU를 최소로 잡는다고해도 한달 유지 서버 운영 비용은 1000만원정도는 잡고 시작하기 때문에 지금 Gemma랑 딥시크를 직접 모델 다운로드하면서 느낀건 api 요청비용이 더 저렴하다는 것을 느꼈습니다.


